This article show a guide on how to paint Ford Focus 2005 headlights by yourself.It will take you about 12-48 hours,and the hours depend on your skill.
What You Need?
Black paint (recommend gloss finish)
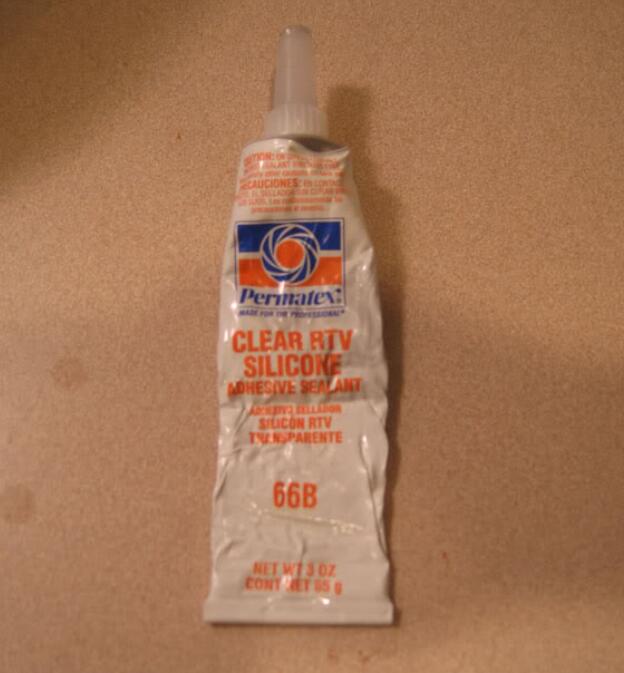
Silicone Sealant
Scour pad
Beer
Masking tape
Tools needed:
10mm wrench
8mm wrench
Phillips screwdriver
Flathead screwdriver
torx bits (allens will work but torx will be better)
Car jack
Your hands
Razor Blade
More Ford Paint Work check: Ford Paint Work
More Ford headlights projects,please check here:Ford Headlights DIY
Procedures:
Step 1
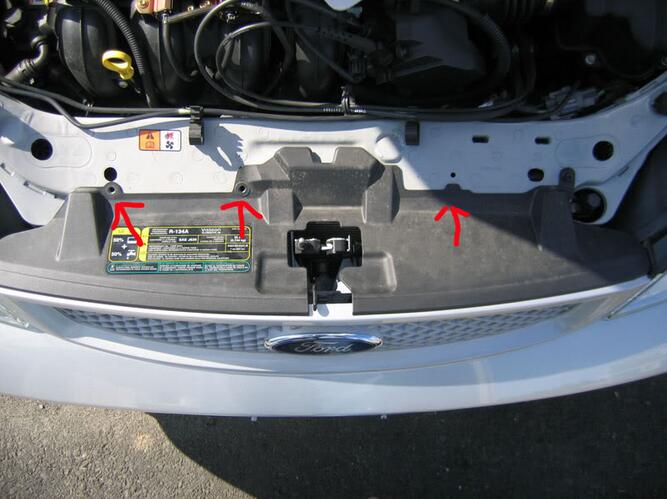
Using a Phillips screwdriver Remove the Black plastic radiator shroud.
Step 2
With a 10mm wrench loosen the two bold hold the upper grill to the radiator frame. Then while pulling forward lift the two clips on either side of the hood latch to remove the upper grill.

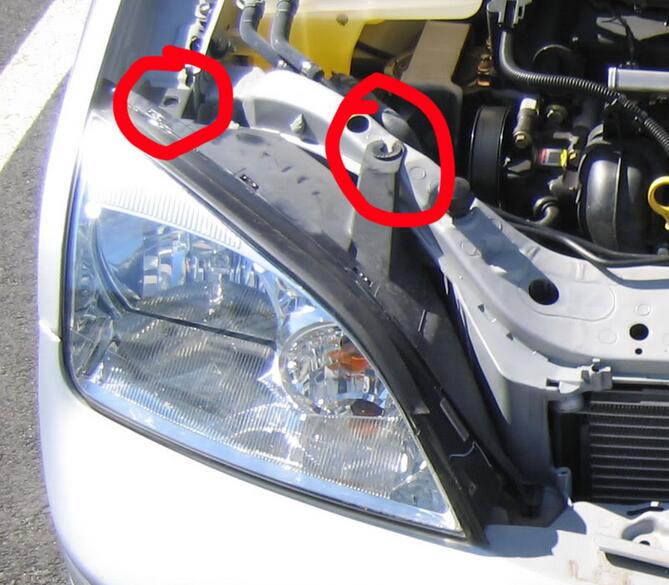
Step 3
Using a 10mm wrench loosen the top two bold on the headlight assembly.
Step 4
Using a car jack lift the side of the car to lower the wheel to gain access to wheel well shroud.
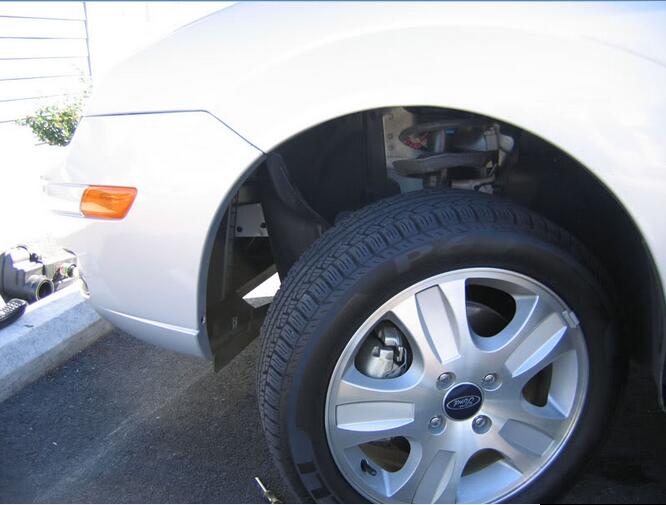
Step 5
Loosen and pull wheel well shroud back using a 8mm wrench and torx bit or allen wrench.
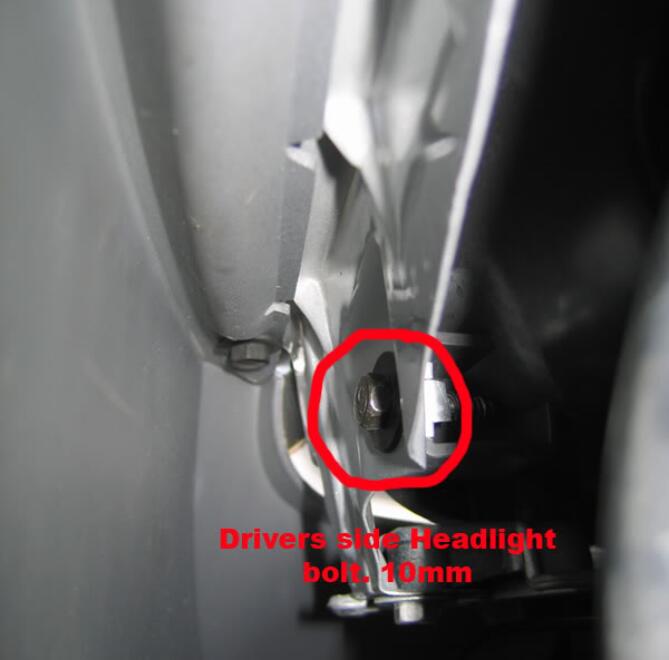
Step 6
Using a 10mm wrench loosen and remove the third and final bolt holding the headlamp assembly on the vehicle.
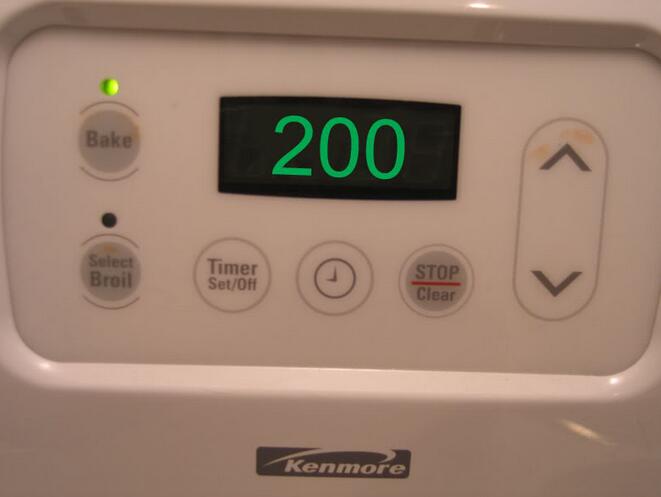
Step 7
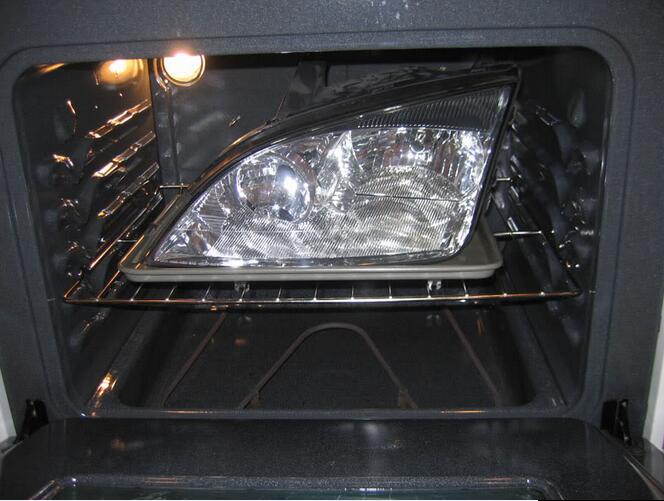
Turn on oven to 200 degrees.
Step 8
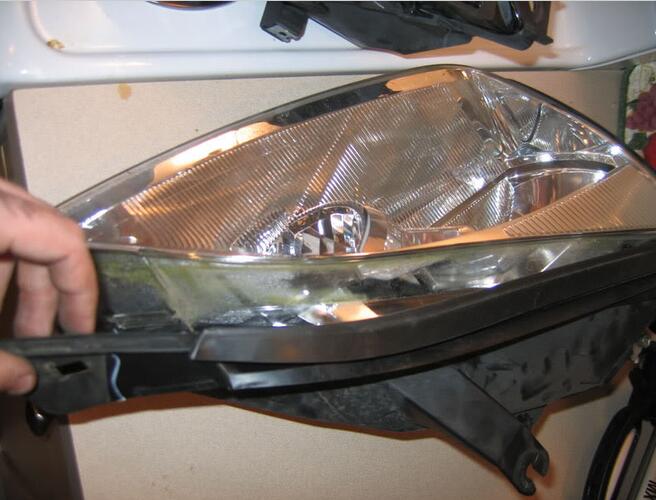
While oven is warming remove the rubber trim from the headlamp assembly.
Step 9
After oven as fully warmed place one headlamp on a baking/cookie sheet in the oven for about 15minutes.
Step 10
Pull out the headlamp. CAREFUL ITS GOING TO BE HOT! I’d wear some sort of oven mitt or work glove to handle the headlamp.
While the head lamp is still hot using a thin flathead work around the edge of the headlamp seal to break the seal.
**NOTE**
You may have to repeat steps 9 & 10 several times over in order to fully break the seal.
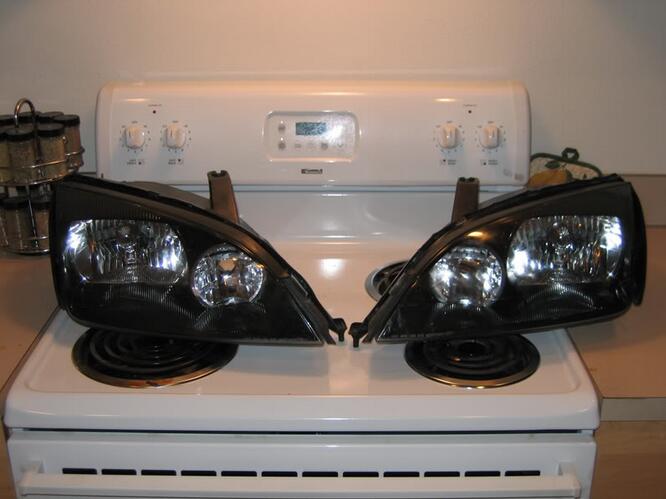
Step 11
Once the clear plastic cover is removed from the black plastic housing you will have to next remove the chrome trim that is going to be painted from the clear plastic housing. TO do use remove the 2 bolts with either a torx bits or allen drive to do so.
Step 12
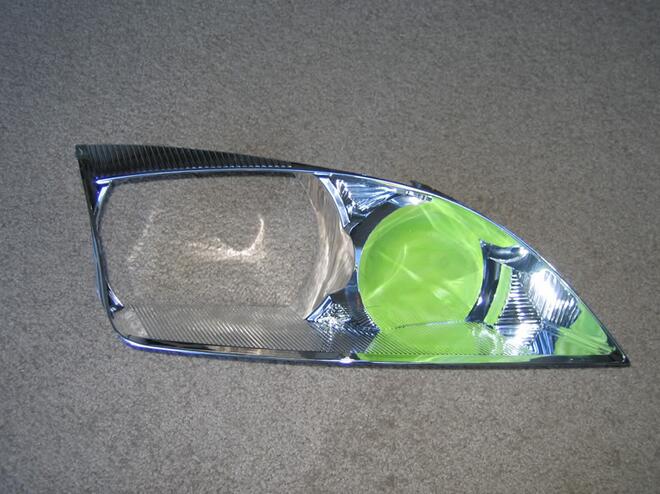
Mask off the area not to be painted. I’d suggest masking of at least the turn signal reflector to keep the fuzz from giving you grief. Using a razor blade to cut the outside edge of the reflector seemed to work well for me.
Step 13
This step is important. Rough up all the surfaces to be painted with the scouring pad so the paint will stick to the plastic. Not doing so will result in poor adhesion of the paint.
I personally forgot this step so I didn’t get as good as results as I should have.
Step 14
Pop the next headlight in the oven
Step 15
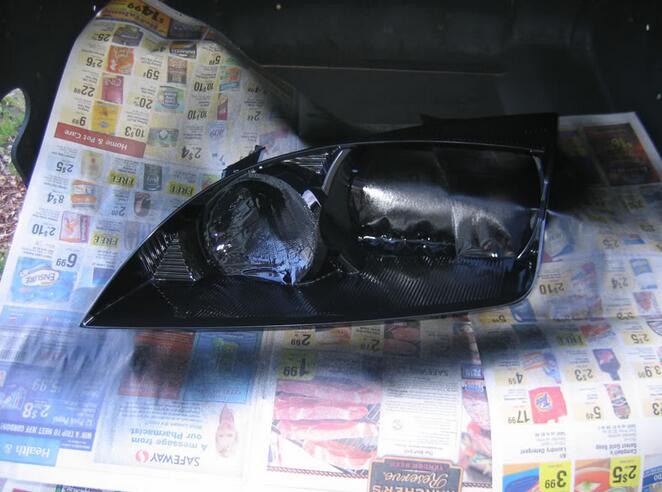
Paint. Make sure to paint in several thin layers as to one thick one. The will help avoid runs and still provide good coverage and overall consistency.
Step 16
Repeat steps 9 thru 15 for your second headlight.
Allow the paint to dry at least an hour before handling.
Step 17 remove the tape from the now black trim. And reinstall the painted trim into the clear housing. Don’t forget the 2 screws that holds on to the clear plastic.

Step 18
Using the silicone sealant run a good thick bead around the black housing where the clear plastic seats into the black housing.
Step 19
Using some tape, tape the two parts together tightly and let it sit at least 8 hours.
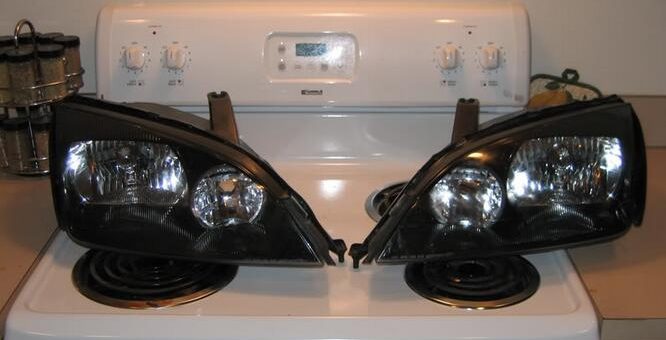
Step 20
Remove tape and marvel at you new hotness of headlights.
Step 21 Perform steps 1-6 in reverse order.
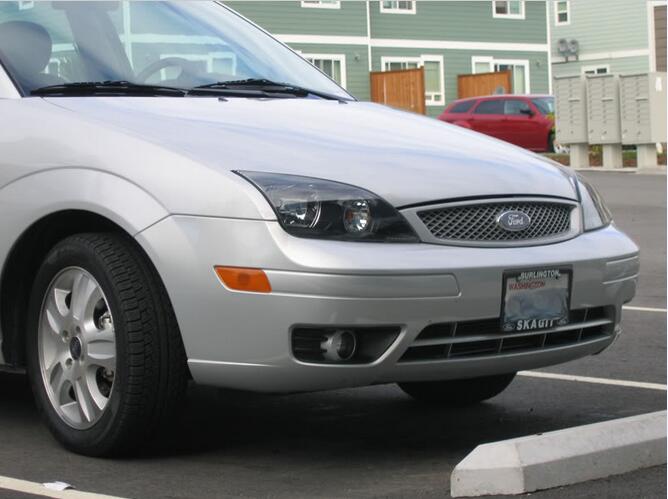
DONE!!! Now you have a unique 2005 Focus that all your friends will drool over.
Note:
This how-to is nothing but merely a guide on the best methods to go about the project. I do not take any responsibility of any ill-effects that occur to you vehicle from this mod or any legal issues they may arise do to the modification of your cars headlight system. PERFORM AT YOUR OWN RISK!